Photography is a core component of any report that an inventory clerk conducts. Photos allow the reader to see the problem you are trying to describe, a picture paints a thousand words after all.
Photos from your reports won’t make very good marketing material but knowing the basics of property photography will give you an edge. Your photos don’t need editing to make sure the colour ratio is correct, or straight but knowing the basics has changed the way I take overview photos of inspection areas and property exteriors.
Watch any YouTube video on the subject and they will guide you through
- What equipment do you need?
- DSLR, Wide View Lenses, Tripod, Camera Case, Level
- How to take photos
- How to edit photos
We are only interested in the how to take photos section which when you remove the tripod and leveling the camera so it’s straight it is easy and not too far from what you are already doing
Property photographers want to get as much of the room as possible into a photo, not too much floor, not too much ceiling. The best way to achieve this in most rooms is to hold your camera around waist height, for a professional photo you want the camera to be level and for the room to look straight by lining up the edge of the photo with a window edge or door frame. But for the needs of an inventory clerk this isn’t necessary just hold your camera a little lower and notice the difference. The only room this will change in is the kitchen, property photographers don’t want a low waist height photo that shows the bottom of kitchen units they want something to show the worktops, lift your device up so that you are chest or shoulder height.
For marketing materials you also don’t want to have reflections of the photographer in a photo but for an inventory clerk this can have advantages, a photo that contains you wearing a mask during an inspection proves you took safety precautions. Reflections of your socks or over shoe covers prove you respected the property and tried to protect it. Not all photography lessons are relevant but some are.
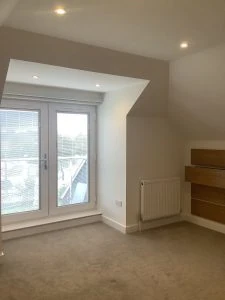
For many years I took my overview photos at shoulder height (I am 6 foot so it’s quite a high). Most of my photos contain a lot of ceilings, since taking photos at waist height the ratio has leveled itself out. Though most would argue the difference is minimal, I feel my reports look better and all it cost was to hold my iPad lower than normal.
Before
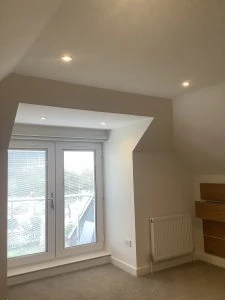
After